

If you’re looking to update your kitchen without the expense of a complete renovation, restaining your kitchen cabinets can be a great option. With the right tools and materials, it’s something that you can easily do yourself. In this article, we’ll go over some tips and tricks for restaining kitchen cabinets to help you achieve a professional-looking finish.
What Is Cabinet Restaining?
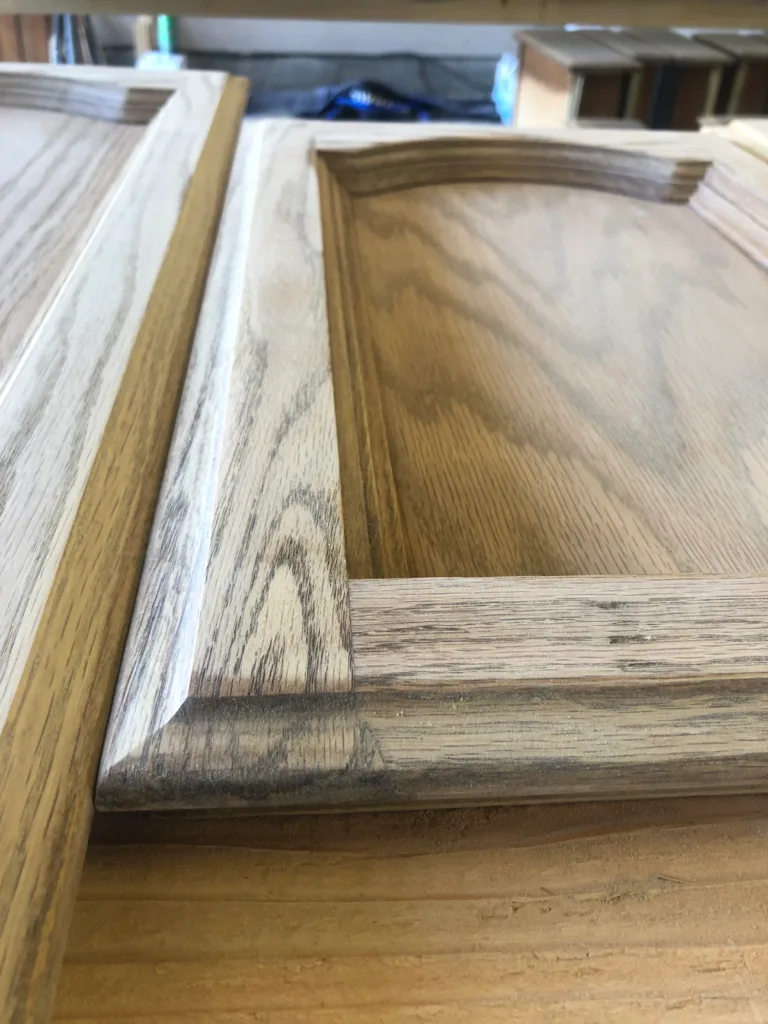
Cabinet restaining involves changing the color of your kitchen cabinets by applying a new stain to the wood. This can be a great way to update the look of your kitchen without having to replace your cabinets entirely. Restaining your cabinets can also be a cost-effective alternative to painting them. If you’re not sure whether restaining or painting is the right choice for your cabinets, check out our page on the best paint for kitchen cabinets for some recommendations.
Restaining your cabinets involves a few key steps, including removing the cabinet doors and hardware, cleaning the cabinets, sanding the cabinets, applying the new stain, and applying a topcoat. Let’s take a closer look at each of these steps.
Can You Restain Cabinets That Are Already Stained?
If you’re restaining your cabinets a darker color, you can often simply apply the new stain over the existing finish. However, if you’re restaining your cabinets a lighter color, you may need to remove the existing stain first to achieve the desired result.
To remove the old stain, you can use a stripping agent or sandpaper. However, if you’re using sandpaper, make sure to sand the cabinets evenly to avoid any visible marks or scratches.
Do You Have to Remove Old Stain Before Restaining Kitchen Cabinets?
If you’re restaining your cabinets a lighter color, you may need to remove the existing stain first to achieve the desired result. However, if you’re restaining your cabinets a darker color, you can often simply apply the new stain over the existing finish.
It’s important to note that removing the old stain can be a time-consuming and messy process, and can sometimes require the use of harsh chemicals. If you’re not comfortable with this process, it’s best to seek the help of a professional.
Do You Have to Sand Cabinets Before Restaining?
Yes, sanding your cabinets is a crucial step in the restaining process. Sanding will remove the existing finish and help the new stain adhere properly to the wood. Check out our page on the best type of roller for some recommended sanding tools.
When sanding your cabinets, make sure to wear protective gear like gloves and a mask to avoid inhaling any dust or debris. Sand the cabinets evenly and thoroughly to ensure a smooth finish.
Is It Better to Restain or Paint Cabinets?
Restaining and painting both have their pros and cons. Restaining can be a great option if you want to keep the natural wood grain visible in your cabinets. Painting can be a better option if you want a completely new look for your cabinets.
When deciding whether to restain or paint your cabinets, consider your personal style and the overall look you’re going for. It’s also important to choose the right materials and tools to ensure a professional-looking finish.
Can I Stain Over Stain Without Sanding?
If you’re restaining your cabinets a darker color, you can often simply apply the new stain over the existing finish. However, if you’re restaining your cabinets a lighter color, you may need to remove the existing stain first to achieve the desired result. Sanding the cabinets before restaining is also important to ensure the new stain adheres properly to the wood.
What Happens If You Don’t Sand Cabinets Before Staining?
If you don’t sand your cabinets before staining, the new stain may not adhere properly to the wood, resulting in an uneven or blotchy finish. Sanding also helps to smooth out any imperfections in the wood and remove any existing finish, allowing the new stain to penetrate the wood more effectively.
Do You Have to Remove All Stain Before Restaining?
If you’re restaining your cabinets a lighter color, you may need to remove all of the existing stain before restaining to achieve the desired result. However, if you’re restaining your cabinets a darker color, you can often simply apply the new stain over the existing finish.
To remove the old stain, you can use a stripping agent or sandpaper. However, if you’re using sandpaper, make sure to sand the cabinets evenly to avoid any visible marks or scratches.
What Is the Best Way to Restain Wood Cabinets?
The best way to restain wood cabinets is to follow the proper steps and use high-quality materials. This includes removing the cabinet doors and hardware, cleaning the cabinets, sanding the cabinets, applying the new stain, and applying a topcoat. We recommend using high-quality stain and topcoat products from reputable brands like Renner Italia and Water Based Finish.
It’s also important to choose the right tools, including sandpaper, brushes, and rollers. Check out our page on common mistakes to avoid for some tips on what not to do during the restaining process.
The Restaining Process
The process of restaining your kitchen cabinets can be broken down into several steps. Here’s an overview of what you can expect:
- Remove cabinet doors and hardware: Remove the cabinet doors and hardware. This will allow you to work on the cabinets themselves without worrying about getting stain on the doors and hardware. Check out our cabinet refacing page for some tips on removing your cabinet doors and hardware.
- Prepare your workspace: Lay down drop cloths or plastic sheeting to protect your floors and countertops from any spills or drips. Check out our blog post on mistakes to avoid when restaining your cabinets for more tips on preparing your workspace.
- Sand the cabinets: Sanding will also help the new stain adhere to the wood better. We recommend using a sanding block or an orbital sander to make the job easier. Check out our best type of roller page for more information on sanding your cabinets.
- Clean the cabinets: After sanding, you’ll need to clean the cabinets thoroughly to remove any dust and debris. We recommend using a tack cloth or a microfiber cloth to clean the cabinets.
- Apply the stain: We recommend using a good-quality brush or roller to apply the stain evenly. You can choose to apply one coat or multiple coats, depending on the depth of color you’re looking for. Check out our page on the best paint for kitchen cabinets for some recommended products.
- Apply the topcoat: Once the stain has dried, you’ll need to apply a topcoat to protect the cabinets and give them a smooth, polished finish. We recommend using a high-quality polyurethane or a wax finish. Check out our page on [Rust-O-Oleum paint] for more information on applying a topcoat.
- Reattach the doors and hardware: After the topcoat has dried, you can reattach the cabinet doors and hardware. Make sure the hardware is tightened securely and the doors are aligned properly.
Tips and Tricks
Restaining your kitchen cabinets can be a time-consuming and labor-intensive process. Here are a few things to keep in mind:
- Choose the right materials: When restaining your cabinets, it’s important to choose the right materials for the job. This includes the stain, topcoat, and brushes or rollers. We recommend using high-quality products to ensure a professional-looking finish. Check out our page on Renner Italia for some recommended stain products.
- Take your time: Restaining your cabinets is not a job to rush through. Take your time and make sure each step is done correctly before moving on to the next one. This will ensure a successful outcome.
- Practice on a sample board: Before restaining your actual cabinets, it’s a good idea to practice on a sample board. This will give you a chance to test out different stain colors and application techniques before committing.
- Don’t skip the sanding: Sanding your cabinets is a crucial step in the restaining process. Skipping this step can result in an uneven finish that won’t adhere properly to the wood.
- Consider professional help: If you’re not comfortable tackling the restaining process on your own, consider hiring a professional. They can ensure a flawless finish and save you time and hassle. Check out our page on Sacramento painters for some local recommendations.
Kitchen Cabinet Restaining Near Me
If you’re not comfortable with restaining your kitchen cabinets yourself, you can always hire a professional. We recommend finding a local painter or cabinet refacing company to help with the restaining process. If you’re in the Sacramento area, check out our page on Sacramento painters for some local recommendations.
Conclusion
Restaining your kitchen cabinets can be a cost-effective way to update the look of your kitchen. However, it’s important to follow the proper steps and use high-quality materials to ensure a professional-looking finish. Remember to remove the cabinet doors and hardware, clean and sand the cabinets, apply the new stain, and apply a topcoat. And don’t forget to choose the right stain and topcoat products from reputable brands like Renner Italia. For more information and tips on restaining kitchen cabinets, check out our blog at vintrocabinets.com/blog.
Links
- The best paint for kitchen cabinets
- Cabinet refacing
- Mistakes to avoid
- Best type of roller
- Sacramento painters
- Renner Italia
- Water-Based Finish